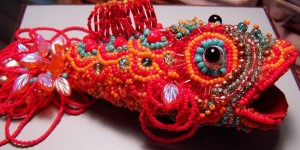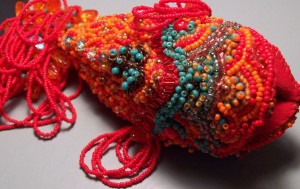
As I said, Edward Scissor Fish is very dimensional. You can see his little suede lined mouth in this picture. That is where the scissors are supposed to go. I love his top fin, I got it to be very wavy. It is two layers thi ck, and when you stagger the layers, you can coax the fin into a wave shape. I am not sure I like the picture of him on his belly. He looks a little dead. I am going to pretend that he just rolled over so as to show off his gorgeous turquoise and copper belly diamond.
Private collection
So I have been working on the bead embroidered bracelet that I showed you a couple of post ago. I have been thinking about technique quite a bit, and thought I would share some of my favorite tips.
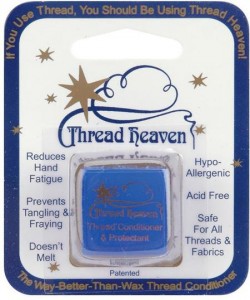
- I do not ever use beeswax as my thread conditioner when working in bead embroidery. It is way too sticky, and builds up on the fabric. Beeswax is normally my conditioner of choice, but it does not work well on fabric. For bead embroidery, I use Thread Heaven.
 You can get this at your local bead shop, any store that sells sewing supplies, or Fire Mountain Gems. It works well at strengthening the thread, and preventing a lot of fraying while you work, and does not leave a sticky residue on the fabric.
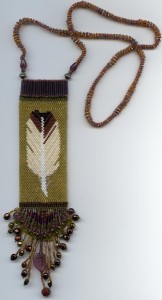
 - I work with a fairly short piece of thread. Normally, I work with the longest piece of thread I can, often 3-4 yards at a time, undoubled. I have found that I am able to handle the length (not too many tangles), and I usually do not have any undue wear on the thread as I get to the end. If I find I am doing the frog stitch(rip it rip it out) too much, and it is getting frayed, I cut it off, but that does not usually happen. With bead embroidery it is a different story. I think it is because it is going through the fabric as well as the beads, and if you are using the correct size needle, the thread is just fitting through the hole you have created, and this makes for extra wear. So when doing bead embroidery, I generally start with about a yard, maybe a yard and a half. Part of why I work with long threads is that I hate securing thread, in and out of a piece. If you look at my entry in TCDesignsArtBlog.blogspot.com about the Eagle Feather Amulet Bag
 I made for my father, you can see how many knots I counted. That is a lot of weaving in and out! When you are working on a fabric background you do not need to weave through a bazillion beads to secure thread ends, you just make a knot and sew right through.
 - Sew back through anything you think might be vulnerable. I have owned so many bead embroidered pieces of clothing or pillows, or curtains, or… that after a little handling, the beads start falling off. A piece of jewelry is especially vulnerable. If you are making a wall hanging, or something that will not get any wear, then you do not need to worry so much about this.
- Knot everything when you are done. As you work on a row, or a small section, and you come to the end, knot the thread. You do not need to start a new piece of thread, you just need to secure the small part you were working on. This way, if the thread does break one day, not everything you sewed with that piece of thread is going to fall off. A client will not be devastated if a few beads fall off and that needs to be fixed, but if large sections fall off, that does not look good, and is expensive for you to fix. You can see the catch-twenty-two here. The more you secure, the better in the long run, but if you knot after every bead, you will spend way too long on one piece, and that is not cost effective either.
- If you are working with sharp edged beads, you need to figure out a way to deal with them. That can be as labor intensive as sanding every last one, or you can pad them top and bottom with other beads. The last option ensures that the sharp beads do not come in contact with the thread, but it is not always the look you are aiming for.
